How to Properly Hook Up a Trailer
What order should you hook up a trailer in? Coupler first, then chains, then wiring, then jack. Doing it in that order means you never have to go back and redo a step, and nothing gets skipped.
Here is the whole process.
Get lined up
Back the truck straight toward the trailer tongue. Aim to stop with the ball a few inches short of directly under the coupler.
Backing up to a trailer is easier with a reference point. Roll your window down and watch the tongue in your mirror. Or have someone stand off to the side, never behind the trailer, and guide you in.
If you are alone, get out and look. Two or three trips back and forth beats one hard bump into the tongue.
Step 1: Set the coupler on the ball
Raise the trailer with the jack until the coupler clears the ball with an inch or two to spare.
Open the coupler latch. Back the truck until the ball sits directly under the coupler opening.
Lower the jack slowly until the coupler drops fully onto the ball and settles. It should sit all the way down, not perched on the edge.
Close the latch. Then look at it. A coupler that is only partly seated can still let the latch close, and it will come off over the first good bump.
Here is the test. Once the latch is closed and pinned, crank the jack down a little further so it starts to lift the back of the truck. If the coupler is properly seated, the truck’s rear end rises. If it pops off the ball, it was never seated. Better to find out now.
Check your ball size before any of this. Most equipment trailers use a 2-5/16" coupler. Smaller utility trailers usually use 2". A 2" ball under a 2-5/16" coupler will sometimes latch and will absolutely come loose on the road.
Step 2: Pin the latch
Put a pin or padlock through the latch mechanism.
This is not optional. Road vibration works latches open. The pin is what keeps that from happening.
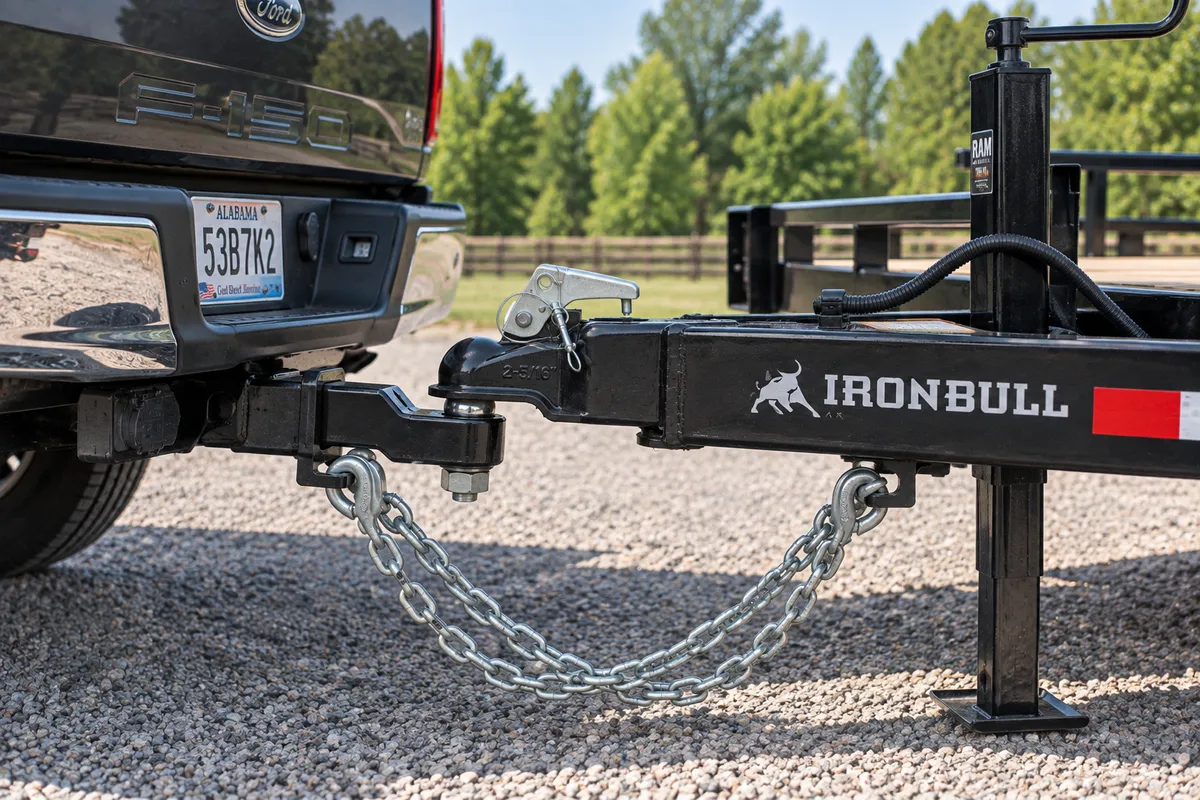
Step 3: Cross the safety chains
Run each chain from the trailer tongue to a solid attachment point on the truck, crossing them under the coupler so they form an X.
Alabama law requires safety chains. The crossing is not decoration. If the coupler ever releases, the crossed chains form a cradle that catches the tongue instead of letting it drop and dig into the pavement.
Attach to the loops or holes designed for chains on your hitch, not to the ball mount bolt and not to the bumper.
Get the slack right. Enough to make a sharp turn without pulling tight. Not so much that they drag on the road. If they scrape during a tight turn, twist them a few times to shorten them.
Step 4: Connect the breakaway cable
If the trailer has electric brakes, it has a breakaway switch with a cable and a pin.
That cable goes to a solid point on the truck. Not to a safety chain.
This trips people up constantly. If you hook the breakaway cable to a safety chain and the coupler releases, the chains hold, so the cable never pulls, so the trailer brakes never come on. The whole system does nothing.
Attach it to the hitch itself or a dedicated loop. Give it slightly less slack than the chains, so it pulls first if things go wrong.
Step 5: Plug in the wiring
Connect the trailer plug to the truck’s socket. Push until it seats firmly.
Route the cord so it has enough slack to turn but cannot drag on the ground or get pinched by the tongue swinging on a sharp turn. A cord that catches under the tongue gets cut in half quickly.
A 4-pin flat plug carries lights only. A 7-pin round plug carries lights plus power for electric brakes and the breakaway battery. If the trailer has brakes, it needs the 7-pin.
Step 6: Raise the jack all the way
Crank the jack fully up. On a swing-away jack, swing it to the travel position and pin it.
A jack left partly down catches on driveway aprons, railroad crossings, and steep gutters. It bends easily and it is an expensive mistake.
Step 7: Test everything before you move
Lights. Have someone watch while you run the brake pedal, the left signal, the right signal, and the hazards. Alone, back up to a garage door or a window at dusk and use the reflection.
Brake controller. If the trailer has electric brakes, confirm the controller in the cab shows a connection. Set the gain for the load.
Tug test. With the truck in gear and the trailer brakes engaged, ease forward a few inches. The trailer should come with you smoothly.
Then roll forward ten feet and use the manual lever on the brake controller. You should feel the trailer brakes grab.
Step 8: Walk around once
One lap before you pull out. Coupler seated and pinned. Chains crossed with correct slack. Breakaway on the truck. Plug seated. Jack up and pinned. Tires look right. Load secure and nothing loose on the deck.
Our full trailer checklist covers the rest of the pre-trip inspection.
Unhooking is the reverse
Park on level ground. Chock the trailer wheels. Lower the jack until it takes the weight off the ball. Unplug the wiring, disconnect the breakaway, uncross the chains, unpin and open the latch, then raise the trailer off the ball.
Never unhook a loaded trailer without thinking about where the weight sits. A load with heavy tongue weight can tip a trailer forward hard once the ball is gone.
Questions before pickup? Get in touch or see how our rentals work.
Serving Montevallo, Alabaster, Pelham, Calera, Helena, and the south Birmingham metro.
